CTI ablation

1. Anatomy

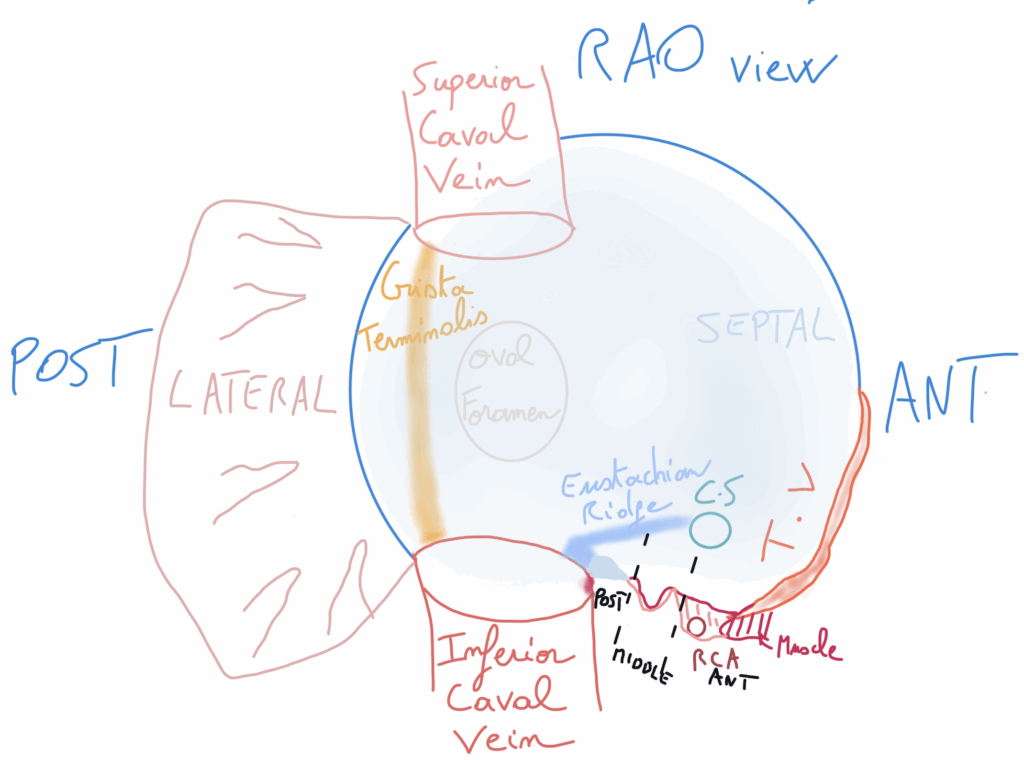
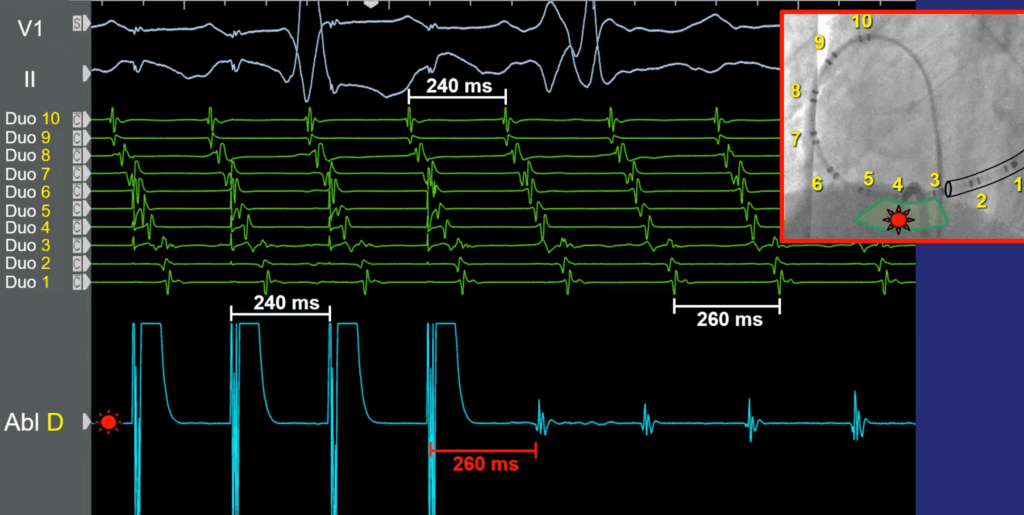
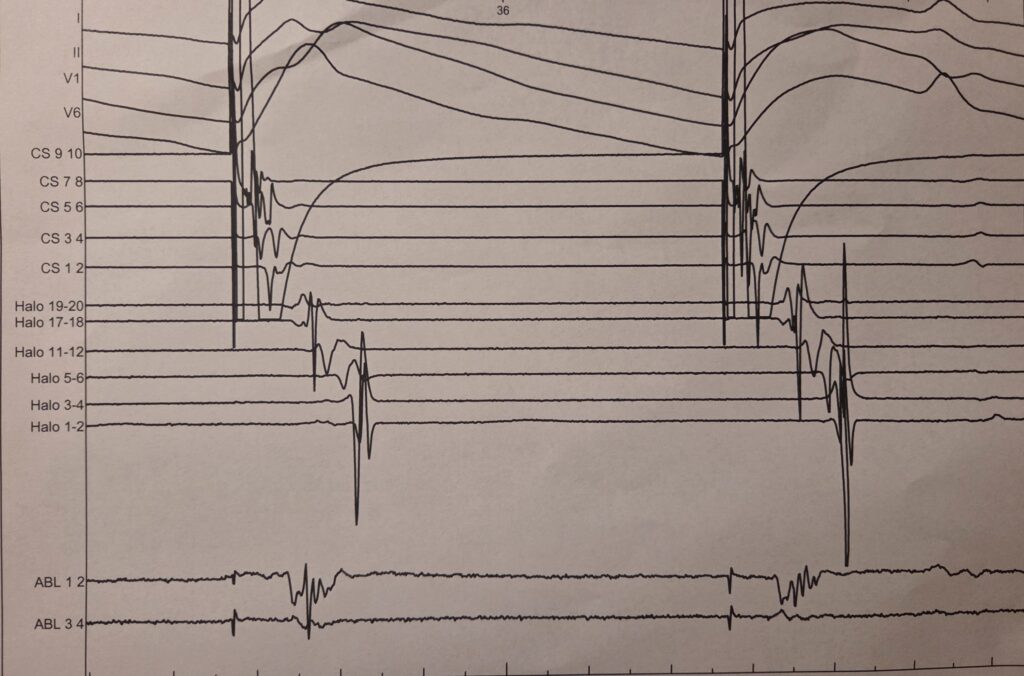
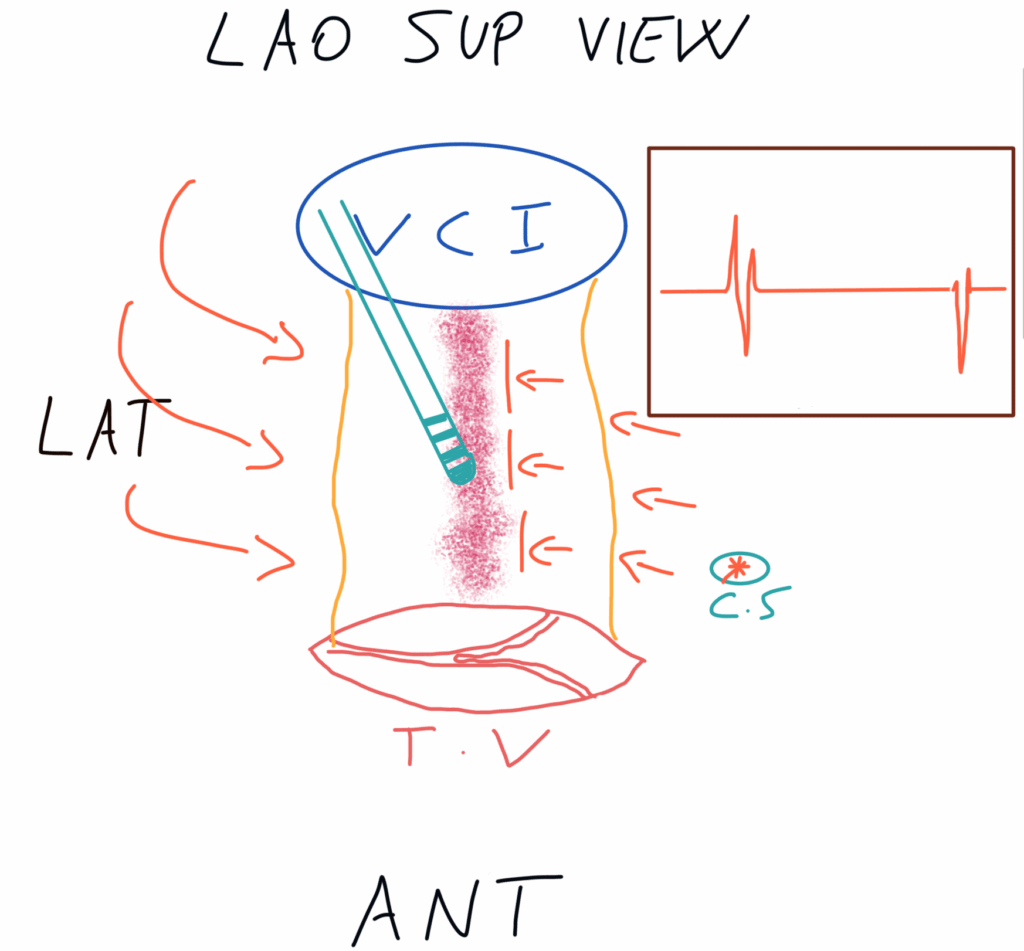
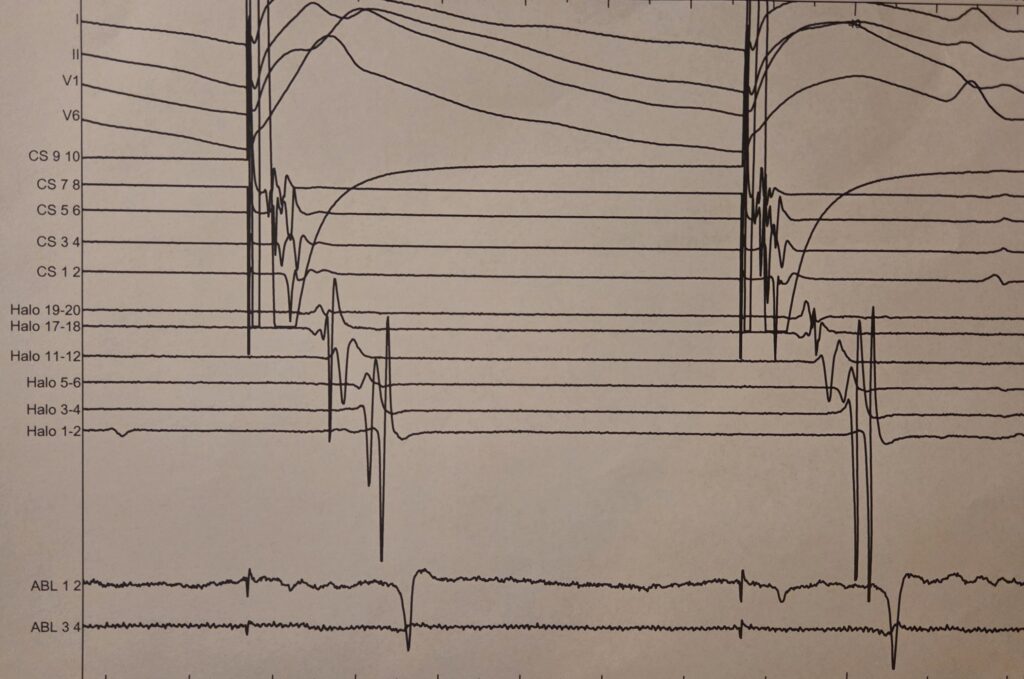
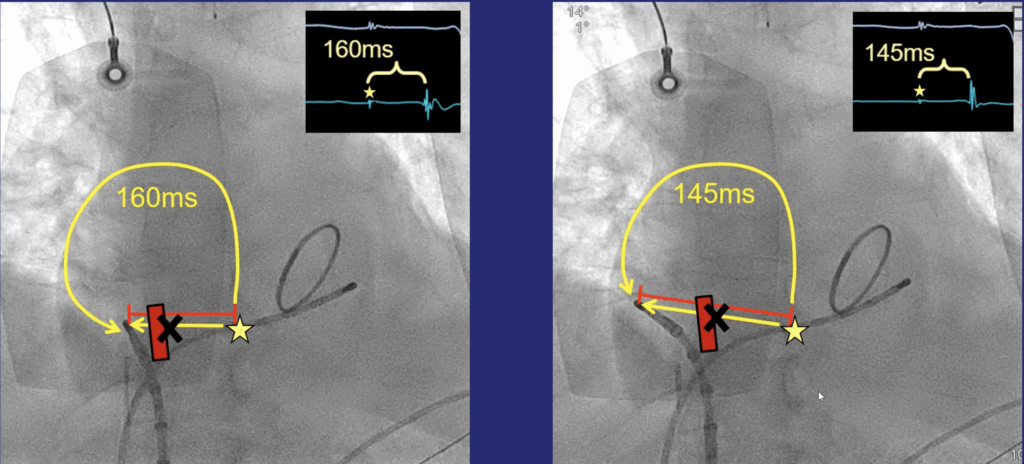
Here you have an RAO view. In front of us, we are looking at the septal aspect of the right atrium. On the right side, you can see the tricuspid valve with the right ventricle superior to it, and inferiorly the superior and inferior vena cava, respectively.
The area of interest is the CTI, which in the RAO view lies between the tricuspid valve and the inferior vena cava.
In the RAO view, the CTI is divided from front to back into anterior, middle, and posterior portions. It originates at the tricuspid valve and can extend toward the inferior vena cava.
When looking at the LAO view, typical right atrial flutter rotates around the tricuspid valve in either a counterclockwise or clockwise direction, crossing the CTI. The objective is to block this CTI by ablating it.

In the LAO view, you can see the septal, medial, and lateral portions of the CTI.

The goal is to stay on the medial part, which—as you can see here—corresponds to the 6 o’clock position.
Here you have a superior LAO view, which helps visualize the CTI.

These three views—RAO, LAO, and superior LAO—allow a better understanding of the CTI anatomy and provide a 3D representation of the isthmus

2- confirmations that the flutter is indeed a typical right flutter

With a typical ECG, it is not necessary to induce right atrial flutter.
For example, in the inferior leads you can clearly see the characteristic negative pattern of counterclockwise flutter.
This occurs because the CTI is a zone of slow conduction, and when the wavefront moves away from the inferior leads—producing a negative deflection—it takes more time to pass through.

Therefore, you can proceed directly with ablation of the right atrial flutter without needing to induce it.
If, however, the flutter is not typical and you have any doubt, you need to induce it and perform a PPI, as shown here, which should be less than 20 ms (<30ms). 
Dr. Joshua Cooper – Arrhythmia Education – Youtube

3. CTI Ablation and Confirmation

There are different ways to ablate the CTI. In this approach, we simply place a CS catheter and use an ablation catheter: either a non-irrigated 8 mm tip or an irrigated 4 mm tip (a non-irrigated 4 mm catheter should not be used).

We position ourselves in the LAO view with the ablation catheter first entering the right ventricle and oriented at the 6 o’clock position. From ventricular side of the CTI, we slide it down while delivering energy until we reach the inferior vena cava.
There are two ways to perform the ablation:
– 60 seconds point-by-point with intermittent applications, or
– 30 seconds while continuously dragging the catheter.
ere you can see that the CTI line has been created, but the isthmus is not blocked. Even if anatomically it looks complete, there is a gap somewhere, and you need to look for it.
The closer you get to the gap, the more fusion you’ll see between the two signals you observed earlier.
…until you finally block the CTI, at which point you will see a clear, obvious double potential.
The best way to confirm that the CTI is blocked is to demonstrate bidirectional block.

First, you pace from the coronary sinus and assess how long it takes for the impulse to reach the CTI. If the wavefront has to travel all the way around before reaching the ablation catheter, this indicates that the line is blocked.

You then compare this with pacing from the lateral side: the delay to reach the CTI should be significantly longer, confirming that conduction can no longer cross the isthmus directly
Now that you have confirmed block from the CS toward the CTI, you also need to confirm block in the opposite direction—from the CTI toward the CS.

You pace from the CTI and from the lateral wall, then compare the time it takes for the impulse to reach the CS. If pacing from the CTI results in a significantly longer conduction time to the CS, this indicates that the line is effectively blocked in both directions

4. Special Cases

a. Pouches → Favor a lateral ablation approach

b. Ridges → Use a sheath to improve catheter stability

c. Muscular isthmus → Prefer a medial ablation strategy

d. Suspected edema → Perform a second ablation session later

e. Difficult or resistant cases → Switch to an irrigated catheter

f. Stepwise approach:
  1st: Middle (6 o’clock)
  2nd: Lateral (7 o’clock)
  3rd: Medial (5 o’clock)

5. Complications

Points of Caution (<1% complication rate)
a. Medial approach: risk to the AV nodal artery
b. Lateral approach: proximity to the coronary artery